XERO - Sub W9 Class
Introduction
This procedure explains how to properly classify suppliers in Xero based on their W9 tax information. Accurate tax classification is essential for proper tax reporting and compliance with IRS requirements. This process should be completed for all new suppliers before processing payments.
Prerequisites
- Access to the Xero accounting system
- Supplier's completed W9 form
- Appropriate permissions to edit supplier information in Xero
Procedure
Accessing the Supplier Record
-
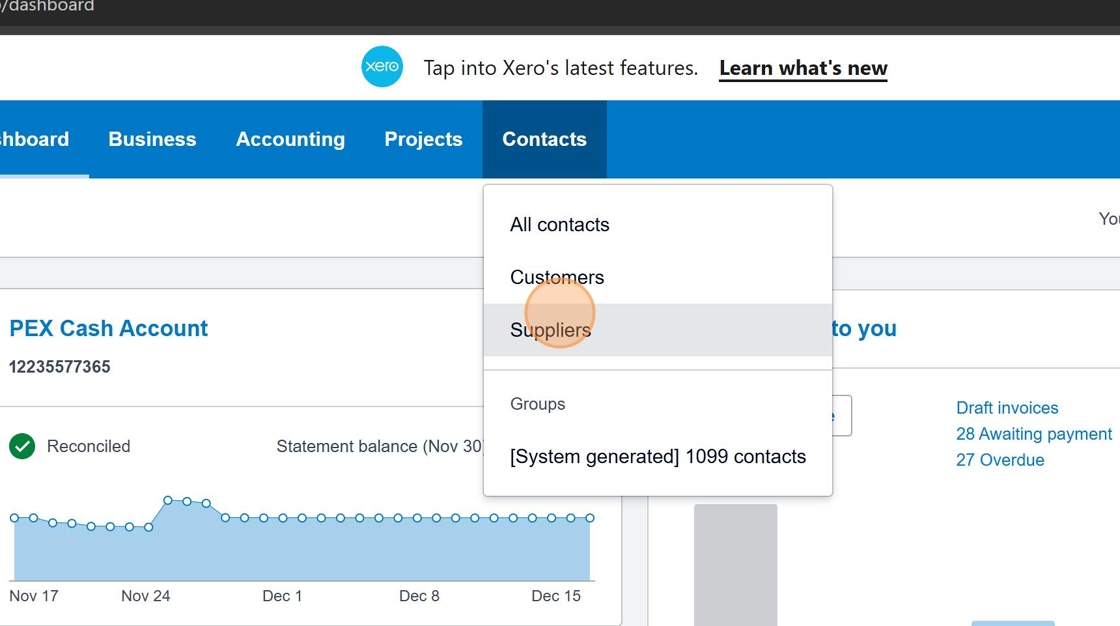
Login to Xero and navigate to Contacts
Begin by logging into your Xero account and accessing the Contacts section from the main menu.
 tip
tipEnsure you're logged in with the appropriate user account that has permissions to edit supplier information.
-
Select the Suppliers tab
Click on the "Suppliers" tab to access your list of vendors and service providers.
Finding the Supplier
-
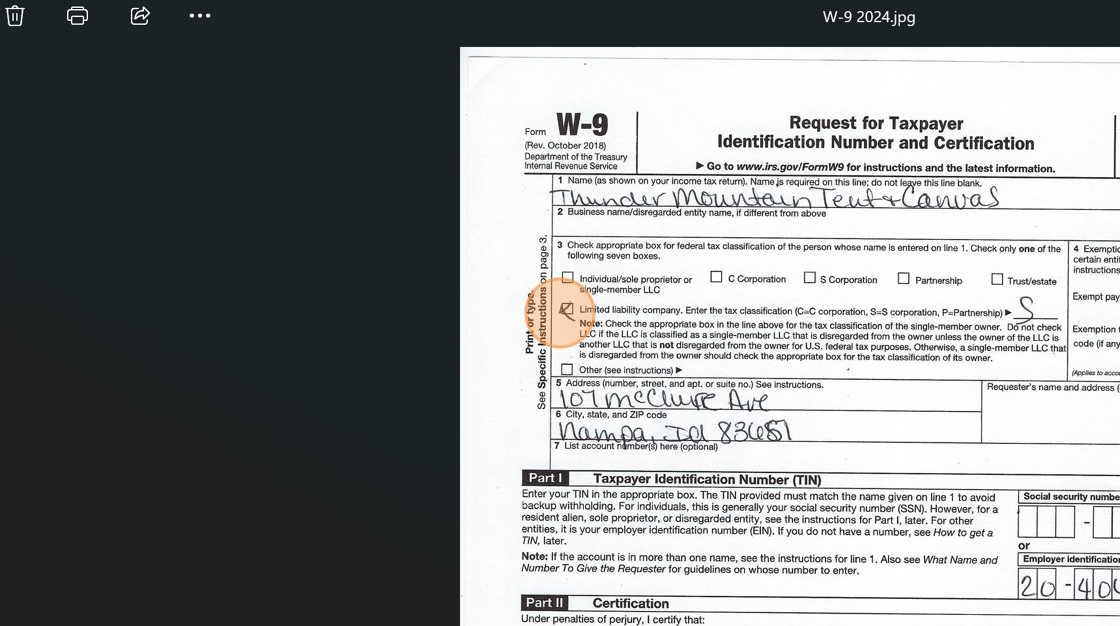
Locate the supplier name on their W9 form
Before searching in Xero, reference the supplier's W9 form to confirm their exact legal name. Look for the name on Line 1 of the W9 form.
 Important
The name used in Xero must match the legal name on the W9 form exactly for proper tax reporting.
-
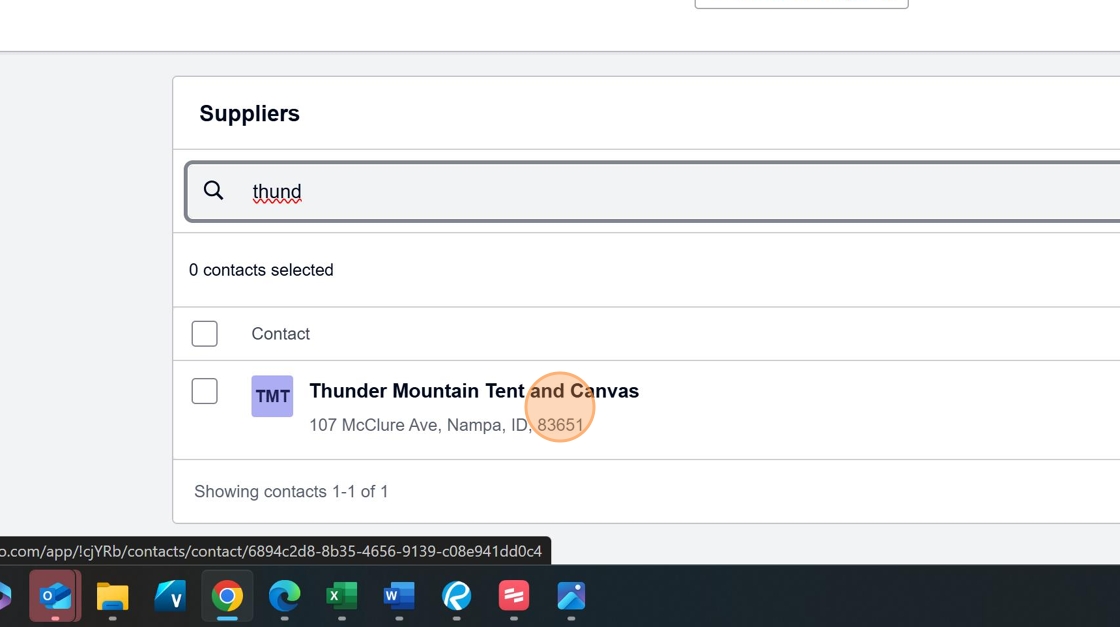
Search for the supplier in Xero
Use the search function to find the supplier in your Xero contacts.

-
Select the supplier from the search results
Click on the appropriate supplier name in the search results to access their contact record.
Updating Tax Information
-
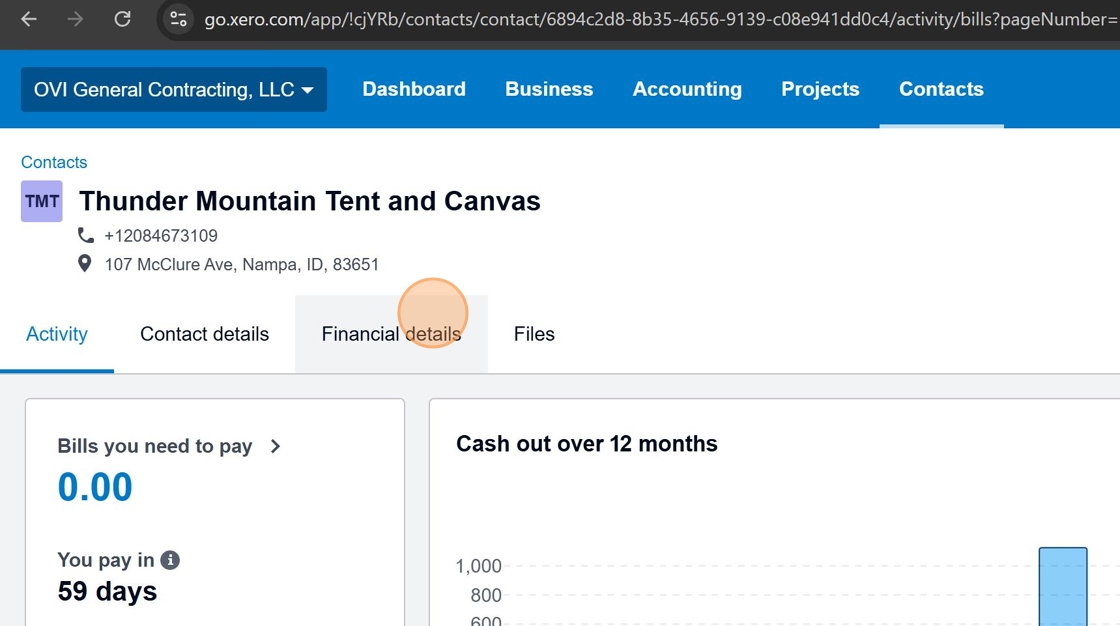
Navigate to Financial details
From the supplier's contact page, click on the "Financial details" tab to access tax information settings.
-
Click Edit to modify financial details
Click the "Edit" button in the upper right corner to modify the supplier's financial information.

-
Enter the supplier's legal name from the W9
In the "Name on the income tax return" field, enter the exact legal name as it appears on Line 1 of the W9 form.
 Legal Name vs. DBA
The legal name might differ from the "doing business as" (DBA) name. Always use the legal name exactly as shown on the W9 for tax purposes.
-
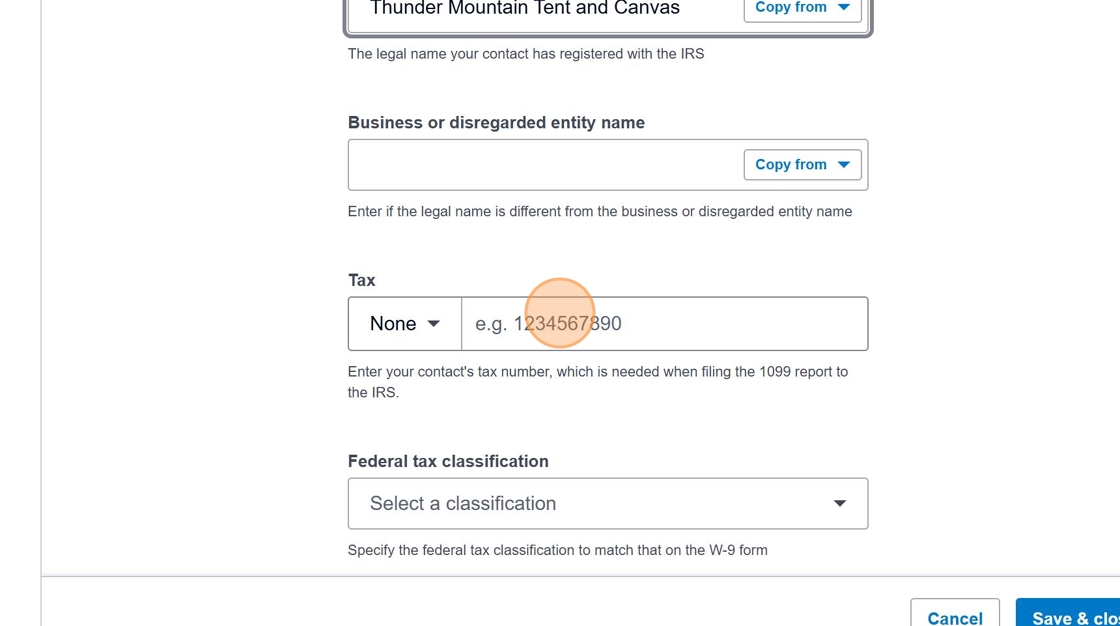
Navigate to the Tax section
Scroll down or click on the "Tax" section to access the tax identification fields.
-
Enter the Tax ID from the W9
Enter the supplier's Tax ID (EIN or SSN) from the W9 form. This field should match Line 2 or 3 on the W9.
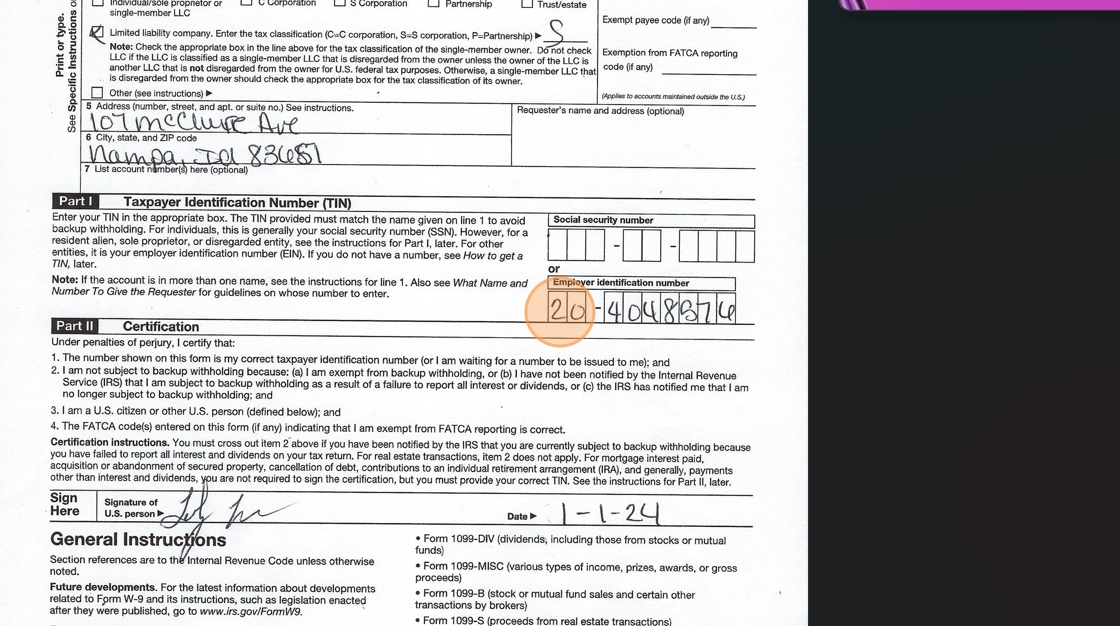
Tax ID numbers are sensitive information. Ensure you're working in a secure environment when handling this data.
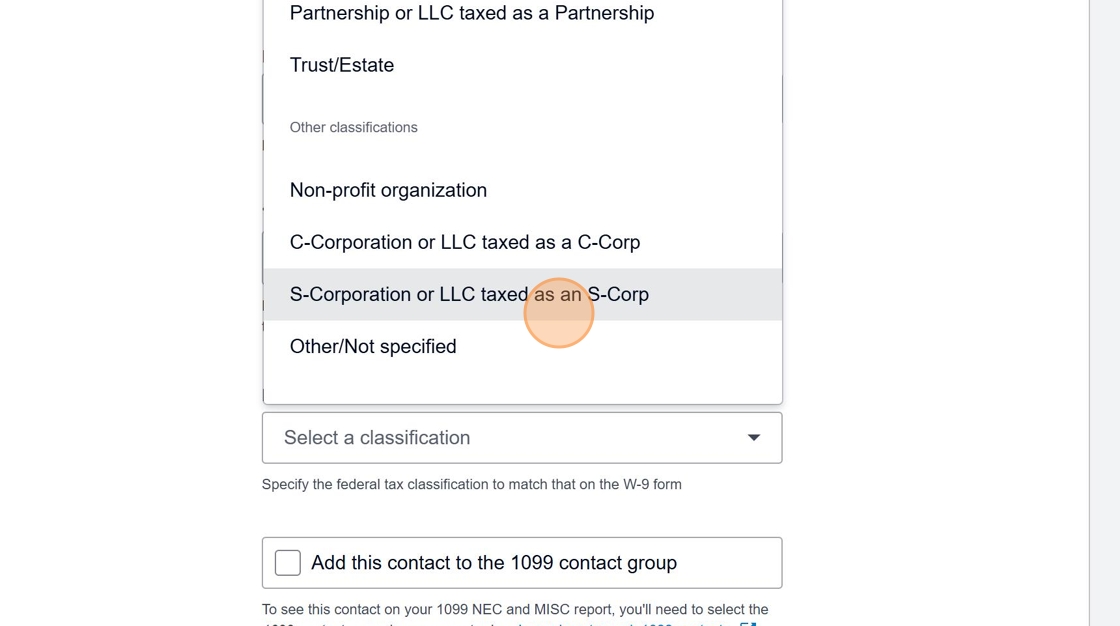
- Select the appropriate tax classification
Click the dropdown menu to select the correct tax classification as indicated on the W9 form. This is a critical field for accurate tax reporting.

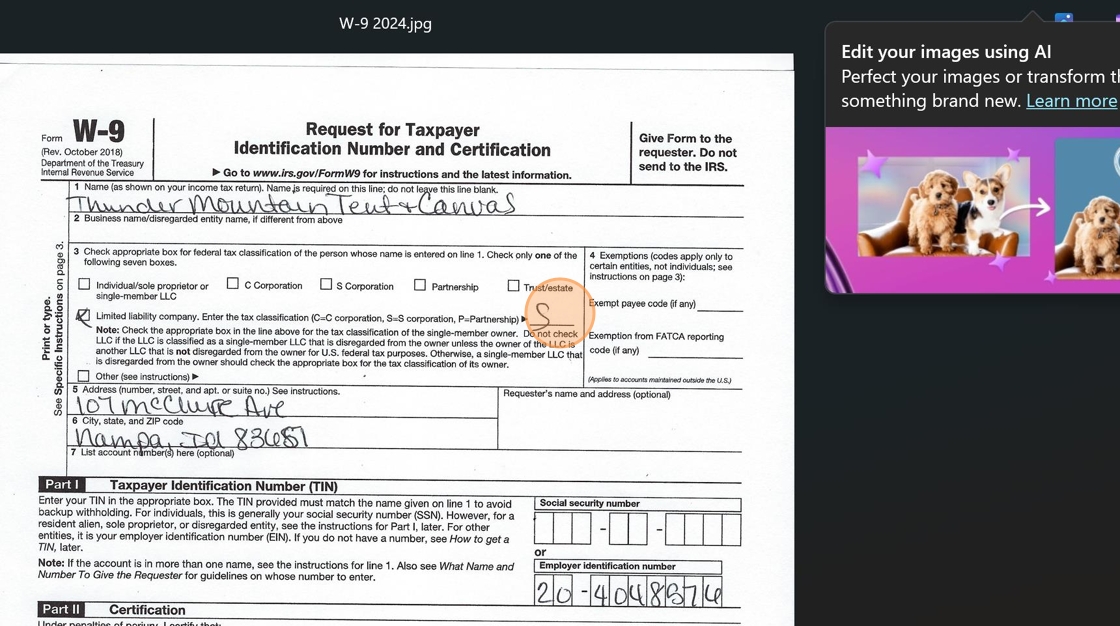
- Reference the W9 for proper classification
Check Box 3 on the W9 form to determine the correct tax classification. The classification options in Xero correspond to the federal tax classifications on the W9.
- Common Classifications
- Individual/sole proprietor or single-member LLC: Use for self-employed individuals
- C Corporation: Standard corporation taxed separately from its owners
- S Corporation: Corporation that passes income, losses, deductions to shareholders
- Partnership: Business relationship between two or more people
- LLC: Limited Liability Company (select appropriate tax treatment)
- Other: For less common entity types (specify in notes)
- Choose the classification that matches the W9
Select the classification that precisely matches what the supplier checked on their W9 form.
Selecting the wrong classification can lead to tax reporting errors and potential IRS issues.
- Save the updated information
After entering all the necessary information, click "Save & close" to update the supplier record.

Verification
After completing the classification update, it's good practice to verify:
- The supplier name in Xero matches the W9 exactly
- The Tax ID is entered correctly
- The tax classification matches what's indicated on the W9
Tax Classification Reference Table
| W9 Classification | Description | Common Use Cases |
|---|---|---|
| Individual/Sole Proprietor | Business owned by one person | Freelancers, consultants, independent contractors |
| C Corporation | Standard corporation | Larger businesses, publicly traded companies |
| S Corporation | Pass-through entity | Small-to-medium businesses seeking tax advantages |
| Partnership | Business with multiple owners | Professional services firms, joint ventures |
| LLC (Limited Liability Company) | Hybrid business structure | Small-to-medium businesses seeking liability protection |
| Trust/Estate | Legal entities for asset management | Inherited businesses, family-owned entities |
Process Checklist
- Obtain completed W9 form from supplier
- Locate supplier in Xero Contacts
- Access Financial Details section
- Enter legal name exactly as shown on W9
- Enter Tax ID correctly
- Select appropriate tax classification matching W9
- Save and verify information
Once all information is correctly entered and saved, the supplier is properly classified for tax reporting purposes. This ensures accurate 1099 generation and helps maintain tax compliance.