Creating and Releasing Invoices in Buildertrend
This guide walks through the process of creating and releasing invoices in Buildertrend, which is essential for maintaining proper billing records and ensuring timely client payments.
Prerequisites
- Buildertrend account with appropriate access permissions
- Completed estimate for the project
- Knowledge of due dates per owner contract
Procedure
-
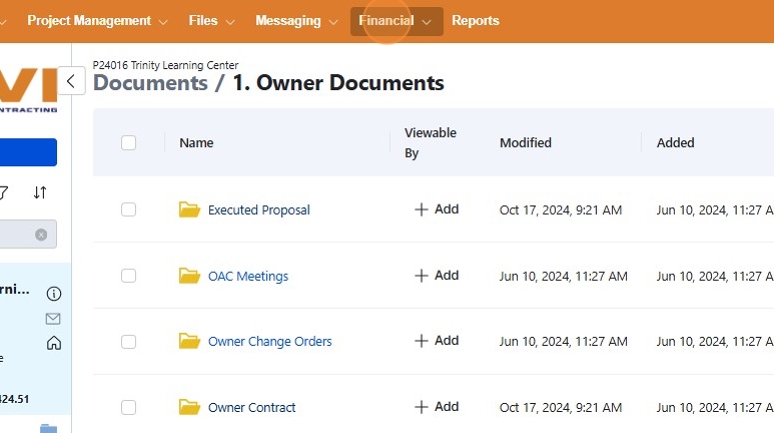
Access the Buildertrend Project Document
Navigate to the project document page in Buildertrend.
 note
noteEnsure you're logged in with the correct user account that has financial permissions.
-
Navigate to Financial Section
Click on the "Financial" tab in the top navigation menu.
-
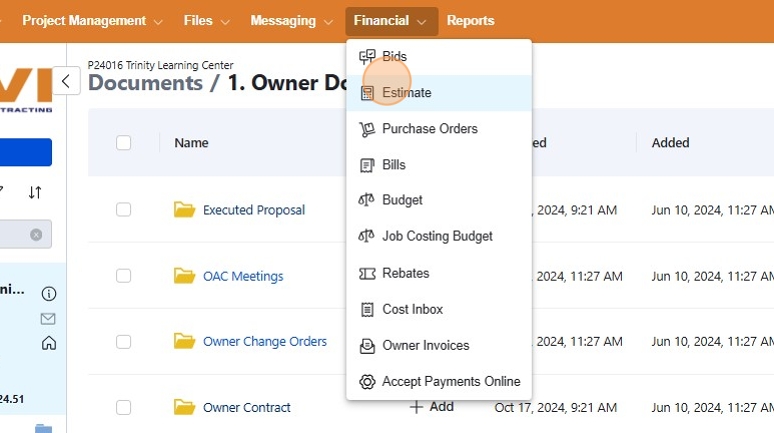
Select Estimate
Click on the "Estimate" option from the dropdown menu.
The estimate details will load, showing all line items included in the project estimate.
-
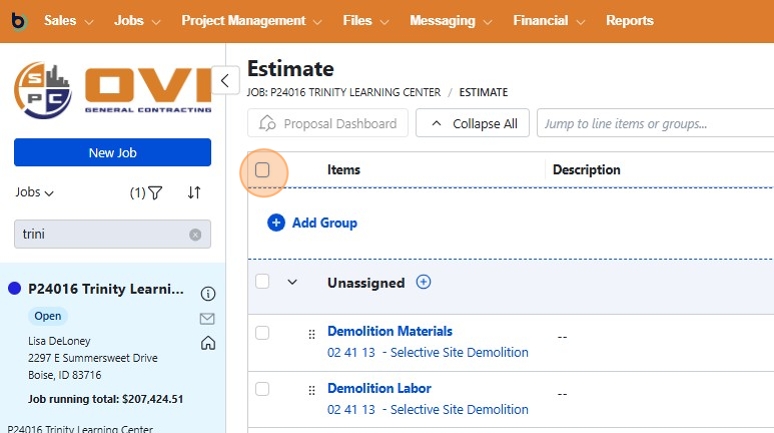
Select Estimate Items
Check the checkbox to select all items in the estimate that should be included in the invoice.

!!! tip You can also select individual items if you only want to invoice for specific parts of the estimate.
-
Create Invoice
Click the "Create" button in the top menu bar, then select "Invoice" from the dropdown menu.

-
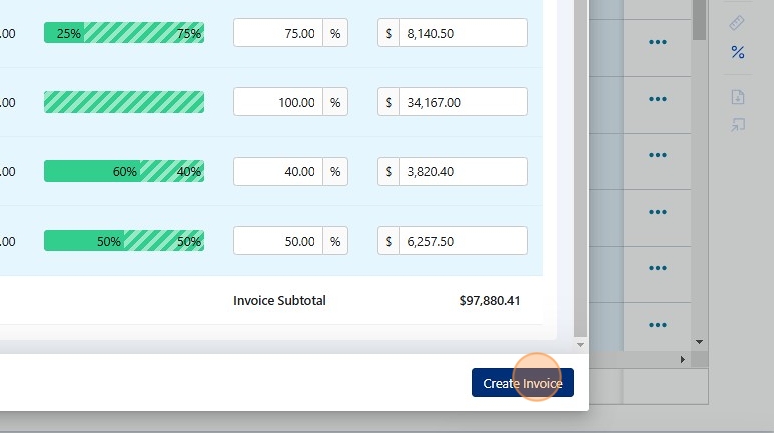
Apply Percentage (Optional)
If you want to apply an overall percentage to every line item, click the "Apply" button. Otherwise, you can manually edit individual line items.

!!! info "Percentage vs. Dollar Amount" You can apply either a percentage or a specific dollar amount to each line item based on your billing requirements.
-
Generate Invoice
After reviewing the line items and amounts, click "Create Invoice" at the bottom of the screen.
-
Add Invoice Title
Enter a descriptive title for the invoice in the "Title" field.
 Title Formatting
Use clear, consistent naming conventions for invoices to make them easily identifiable. For example: "Project Name - Progress Payment #1"
-
Set Due Date
Enter the invoice due date according to the terms specified in the owner contract.
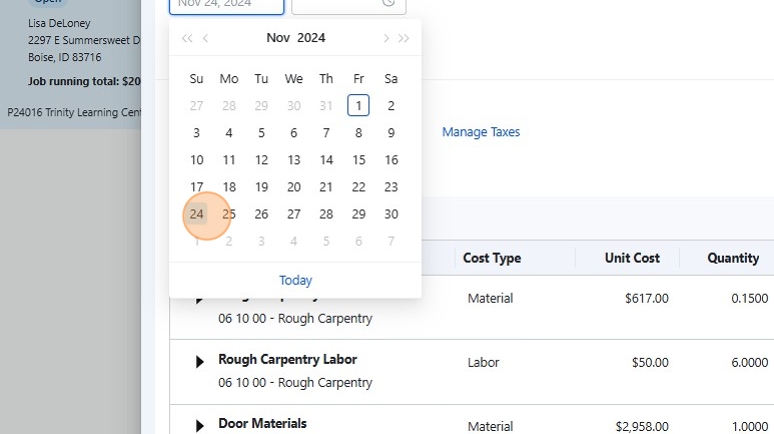 Contract Compliance
Always verify the payment terms in the owner contract to ensure the due date is set correctly.
-
Save and Release Invoice
Click the "Save & Release" button to complete the invoice creation and make it available to the client.

-
Confirm Release
In the confirmation dialog, click "Release" to finalize the invoice.

-
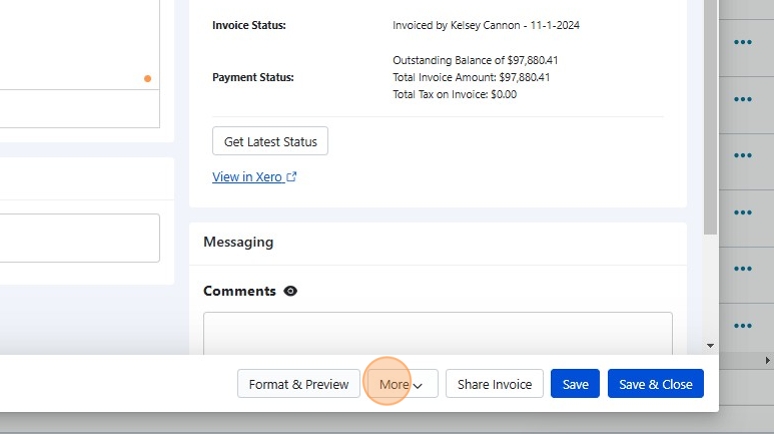
Access Additional Options
Click the "More" button to access additional options for the invoice.
-
Save as PDF and Distribute
Click "Print" to save the invoice as a PDF. This allows you to both maintain a record in Buildertrend and email the PDF to the client for their records.
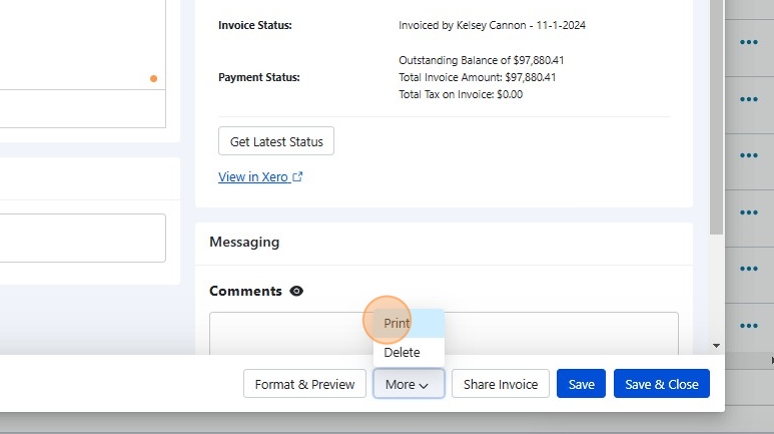 Best Practice
Always release the invoice through Buildertrend's system AND email the PDF to the client to ensure they receive proper notification.
Process Diagram
Checklist
Use this checklist to ensure you've completed all required steps:
- Accessed the correct project in Buildertrend
- Navigated to the Financial section and Estimate
- Selected appropriate line items for the invoice
- Applied correct percentages or amounts to line items
- Added descriptive invoice title
- Set accurate due date according to contract terms
- Saved and released the invoice
- Confirmed release in the dialog
- Saved invoice as PDF
- Distributed invoice to client
After releasing the invoice, track its status in Buildertrend to monitor when payment is received.