Add OneDrive to Computer
This guide provides a step-by-step process for adding OneDrive files to your local computer, ensuring seamless access to your documents.
Introduction
OneDrive is Microsoft's cloud storage service that allows you to synchronize files between your local computer and the cloud. This guide will help you set up OneDrive for your OVI-GC account, ensuring you can access important company files directly from your file explorer.
Initial Setup Procedure
-
Locate the OneDrive icon in the system tray
Find the OneDrive icon (blue cloud) in your system tray on the bottom right of your screen.
Finding the OneDrive IconRight-click on the small blue cloud icon in the bottom right corner of the screen (system tray). If not visible, click the 'up' arrow to display all open apps in the system tray.

-
Open OneDrive settings
Right-click the OneDrive icon and access the settings menu.

-
Access account settings
Navigate to the account settings section in the OneDrive menu.

-
Add an account
Click on the option to add a new account to OneDrive.

-
Sign in
Proceed to sign in with your company account.

-
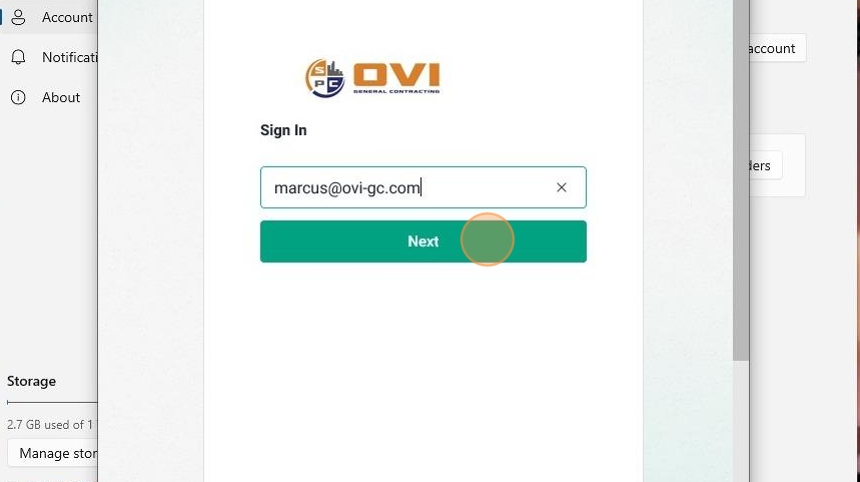
Enter your OVI company email
Type in your OVI company email address in the provided field.

-
Proceed with sign-in
Continue with the sign-in process by clicking the Next button.

Authentication Process
-
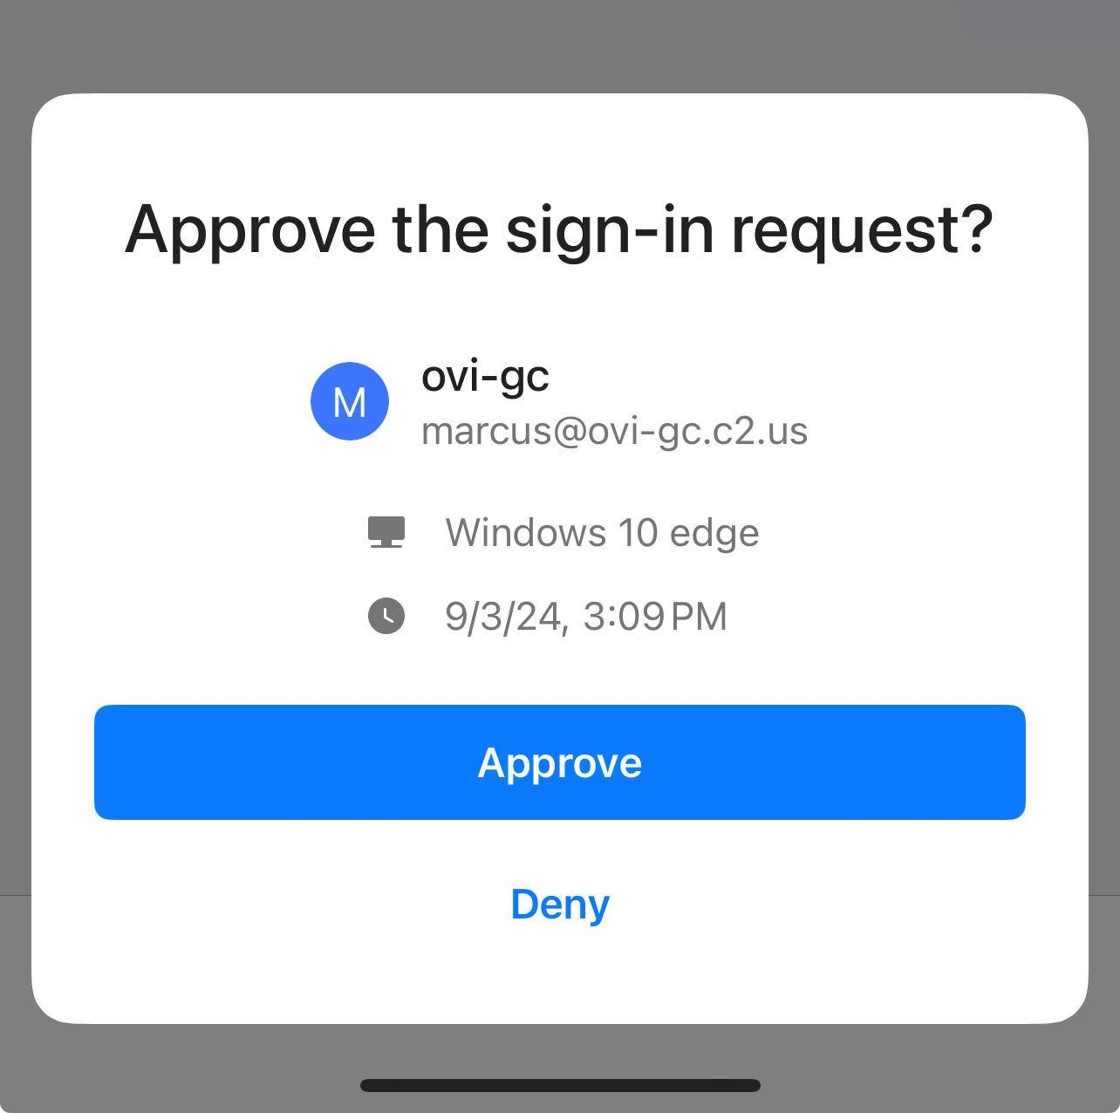
Login prompt
The system will show a login prompt for authentication.
noteYou will be prompted to login using your company single sign-on identity connected to the secure login app on your mobile device.
-
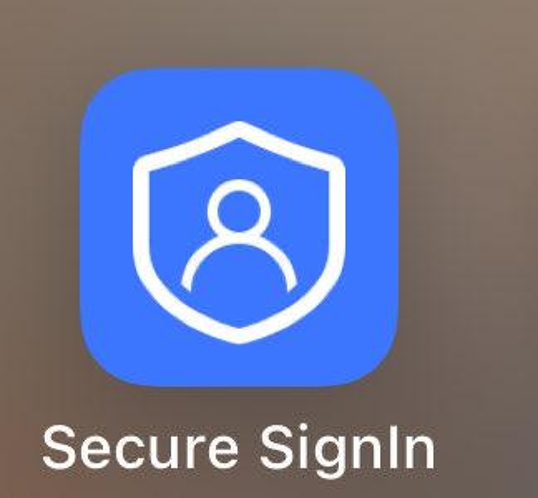
Open secure Sign-in app on your mobile device
Access the authentication app on your mobile device to approve the sign-in request.
-
Approve sign-in request
Approve the authentication request on your mobile device to complete the sign-in process.
Adding Additional Folders
-
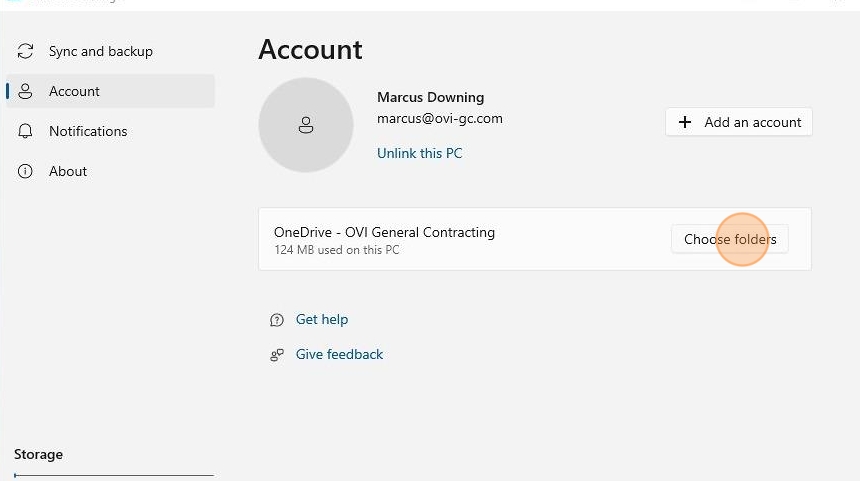
Access folder settings
After successful authentication, configure which folders to synchronize.
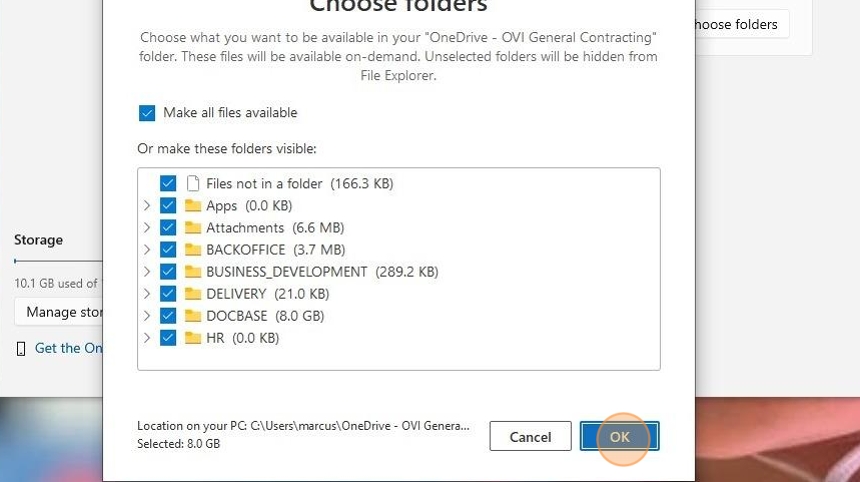
Adding More FoldersTo add additional folders, go to "Settings" and select "Choose Folders".
-
Select folders to synchronize
Choose which specific folders you want to synchronize with your local system.
Synchronization TimeSelected folders will synchronize with your local system. Initial synchronization may take 5 minutes to an hour due to Microsoft OneDrive limitations.
Checklist
- Locate OneDrive icon in system tray
- Open OneDrive settings
- Access account settings
- Add a new account
- Sign in with company email
- Complete authentication via mobile device
- Select folders to synchronize
Conclusion
By following these steps, you've successfully set up OneDrive synchronization for your OVI-GC account on your local computer. You can now access and manage your OneDrive files directly from your file explorer.
Your OneDrive is now configured and will start synchronizing your selected folders. You'll be able to access all company files that have been shared with you through your local file system.